Wednesday, December 15, 2010

it's cupcake time in the city

So for Christmas this year, I decided to make some Christmas cupcakes for friends and for a Christmas party last weekend.  I'd have to say, I had a ball.

Very Vanilla Snowflake Cupcake

For this cupcake I just used a vanilla box mix.  I know, I know, but I'm in grad school okay.  I made these little snowflakes with some white royal icing and some pearl sprinkles.  The icing in just vanilla buttercream tinted with a little bit of Wilton royal blue icing.


Cran-Orange-Pecan Cupcake

This is pronounced pee-can, not pe-caun, just FYI.  I used the other half of that vanilla cake mix and added in some orange zest, chopped cranberries, and chopped pecans.  The icing for these was a vanilla-orange buttercream and the garnish was a whole pecan and half a berry.


Hot Coco Cupcakes

These were done with a chocolate box mix, mini marshmallows glued on with some vanilla butter cream and a pepper mint stick in the top.  Really simple, but super cute.


Peppermint Chocolate Cupcake

For these I also used the left over chcolate mix from the last set.  I just added some crushed candy canes to the buttercream.  You have to crunch it pretty fine, or it will get stuck in the tip.  I tinted it pink and put some more crushed candy cane on top.


Gingerbread Cupcake

These tasted SO good.  I got the recipe off of Martha Stewart.  It makes 24 cupcakes.  I frosted them with cream cheese icing and some simple sprinkles or some cinnamon.


  • 2 teaspoons baking soda

  • 2 1/2 cups all-purpose flour

  • 2 teaspoons ground ginger

  • 1 1/2 teaspoons ground cinnamon

  • 1/2 teaspoon ground cloves

  • 1/2 teaspoon ground nutmeg

  • 1/2 teaspoon salt

  • 2 teaspoons baking powder

  • 8 tablespoons (1 stick) unsalted butter, room temperature

  • 2/3 cup packed dark-brown sugar

  • 1 cup unsulphered molasses

  • 2 large eggs, room temperature, lightly beaten


    1. Heat oven to 350 degrees. Line 24 muffin tins with paper baking cups, and set aside. In a small saucepan, bring 1 cup water to a boil. In a bowl, combine boiling water and baking soda; set aside. In a large bowl, sift together flour, ground spices, salt, and baking powder; set aside.
    2. In an electric mixer fitted with the paddle attachment, cream the butter until light. Beat in the brown sugar until fluffy, 1 to 2 minutes. Beat in the molasses, baking-soda mixture, and flour mixture. Beat in the eggs.
    3. Fill the cupcake papers three-quarters full, making sure that the batter is divided evenly. Bake cupcakes until a toothpick inserted in the center of them comes out clean, about 30 minutes. Let cupcakes cool a few minutes, then transfer to a wire rack to cool completely before decorating.


    Egg Nog Cupcakes

    I'm not sure if these tasted better or if the ginerbread ones did.  They definatly looked beautiful.

    Ingredients

    • 1  (16-oz.) package pound cake mix
    • 1 1/4  cups  eggnog
    • 2  large eggs
    • 1/2  teaspoon  freshly grated nutmeg
    • 1/2  teaspoon  vanilla extract

    Preparation

    1. Preheat oven to 350°. Beat all ingredients together at low speed with an electric mixer until blended. Increase speed to medium, and beat 2 minutes. Pour into a lined cupcake pans.  Makes about 16.
    2. Bake at 350° for about 18 minutes.

    Frosting
  • 1/2  cup  butter, softened

  • 1  (3-oz.) package cream cheese, softened

  • 1  (16-oz.) package powdered sugar

  • 1/4  cup  eggnog

  • 1/2  teaspoon  freshly grated nutmeg

  • 1/2  teaspoon  vanilla extract


  •  Beat butter and cream cheese with an electric mixer until creamy. Gradually add powdered sugar alternately with eggnog, beginning and ending with sugar and beating at low speed. Add freshly grated nutmeg and vanilla extract; beat until smooth. Spread over cupcakes.

    I garnished these with a cinnamon stick.  I found these in the mexican food's section.


    Pink Flowers!

    Another good friend of mine had a very special birthday on Dec. 6th...


    This cake was 5 layers of yellow cake with a semi-sweet chocolate ganache inbetween.  I used butter cream to dam the filling and crumb coat the cake and then covered the whole thing in pink marshmallow fondant.  The little back ball border is fondant (I had dye on my fingers for about a week) and the flowers and topper are made from a white and very dark gray royal icing.  
    My picts of this didn't turn out that great, but the cake was quite pretty! 

    Friday, December 3, 2010

    Birthday #24

    My birthday was on Sunday and that called for a really nice cake.  I started making it on Saturday and it was going to be this awesome 10" yellow cake with chocolate cream filling.  Well, after a series of small disasters, I ended up throwing that cake away and starting over.  I guess I have been watching too much Cake Boss or something.  


    Anyways, the cake I made ended up pretty awesome.  I also tried out marshmallow fondant for the first time and it was SO FUN!!!  Sticky, but really fun.  I will make some sort of tutorial looking post for it later because it is definitely something that should be tried.  I just made the David's yellow cake that I love, filled it will raspberry and chocolate (I didn't have enough chocolate to fill the whole thing b/c of that dumb cake that I threw away) and frosted it with a quick crumb coat.


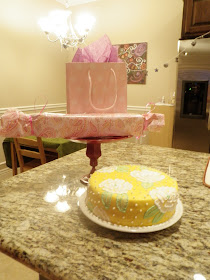
    I made the fondant and dyed it all yellow.  My yellow turned out a little bright, but it's my favorite color so it was perfect.  I put some nice white flowers and green leaves on there with royal icing and a brush, and then I stuck all these nice little pearl sprinkles on. 
    My friends also gave me a beautiful red cake server and my cake looked pretty nice on it.


    Friday, November 26, 2010

    Thanksgiving

    So...
    This year for Thanksgiving, I had the wonderful privilege to stay in Utah.  Luckily some of my best friends in the whole world were also staying here so what could have been a very lonely holiday turned into to A LOT of fun.  We had a great dinner, did some shopping and crafting, and most importantly, tried new desserts.


    The first one, which was the bestest thing I have tasted in a LONG time, was PUMPKIN CHEESE CAKE.  I got some spring form pans for this and it was totally worth it.  The cheesecake turned out really nice looking and good tasting.  It was the perfect mix of pumpkin pie and New York cheesecake.  We were not disappointed.


    Martha Stewart Pumpkin Cheesecake
    • FOR THE CRUST
    • 1 1/4 cups graham-cracker crumbs (from 10 whole crackers)
    • 1/4 cup sugar
    • 4 tablespoons unsalted butter, melted
    • FOR THE FILLING
    • 4 packages (8 ounces each) bar cream cheese, very soft
    • 1 1/4 cups sugar
    • 3 tablespoons all-purpose flour
    • 1 cup canned pumpkin puree
    • 2 tablespoons pumpkin-pie spice
    • 1 tablespoon vanilla extract
    • 1/2 teaspoon salt
    • 4 large eggs, room temperature

    Directions

    1. Preheat oven to 350 degrees, with rack in center. Assemble a 9-inch nonstick springform pan, with the raised side of the bottom part facing up.
    2. Make the crust: In a medium bowl, mix cracker crumbs, sugar, and butter until moistened; press firmly into bottom of pan. Bake until golden around edges, 10 to 12 minutes.
    3. Make the filling: With an electric mixer, beat cream cheese and sugar on low speed until smooth; mix in flour (do not overmix). Add pumpkin puree, pie spice, vanilla, and salt; mix just until smooth. Add eggs one at a time, mixing until each is incorporated before adding the next.
    4. Place springform pan on a rimmed baking sheet. Pour filling into springform, and gently smooth top. Transfer to oven; reduce oven heat to 300 degrees. Bake 45 minutes. Turn off oven; let cheesecake stay in oven 2 hours more (without opening).
    5. Remove from oven; cool completely. Cover with plastic wrap; refrigerate until firm, at least 4 hours. Unmold before serving.


    Hershey's Gone To Heaven Chocolate Pie

    Ingredients

    • One 9-inch pie shell
    • 2/3 cup sugar
    • 1/3 cup cornstarch
    • 1/2 teaspoon salt
    • 4 egg yolks
    • 3 cups milk
    • 2 tablespoons butter or margarine, softened
    • 1 tablespoon vanilla extract
    • 2 cups (12-oz. pkg.) HERSHEY'S SPECIAL DARK Chocolate Chips, divided
    • Sweetened whipped cream or whipped topping (optional)

    Directions

    Bake pie shell; cool. Stir together sugar, cornstarch and salt in 2 quart saucepan. Combine egg yolks and milk in container with pouring spout. Gradually blend milk mixture into sugar mixture.
      Cook over medium heat, stirring constantly, until mixture comes to a boil. Boil and stir 1 minute. Remove from heat; stir in butter and vanilla. Add 1-3/4 cups chocolate chips; stir until chips are melted and mixture is well blended. Pour into prepared pie shell; press plastic wrap onto filling. Cool. Refrigerate several hours or until chilled and firm. Garnish with whipped cream and remaining chocolate chips, if desired. 6 to 8 servings.


      Saturday, November 6, 2010

      Best Leftovers EVER!

      So I still had some frosting and filling left over from making Gabe's cake so I put it in the freezer until I could make something else.  I baked some more chocolate cake on Thursday because it just tasted so good.


      I stacked it and it was a little harder than usual, but I got it dirty iced and looking pretty good.


      I iced the top with some smooth white buttercream and then I started putting some lines around the outside using the colors I had from Gabe's party.  I just used 3 fat round tips for the 3 different colors.


      I kind of smoothed down all the little peaks from the tops of my colored lines.  This was pre-smoothing.


      And then put some shells around the top and bottom.


      Dats good!

      Tuesday, November 2, 2010

      Gabe's Cake: Part 2

      So my little break was great and I got back home late Sunday.  I had put the frosting and cake in the freezer over the weekend and had my roommate pull it all out on Sunday so I could build the cakes on Sunday night.  I got all the layers filled and dirty iced and stuck it in the fridge.
      Today, Monday, I did all the cool frosting work.  I put some paper glitter stars on wire and had them sticking out, which turned out pretty cute.  The top tier of the cake was on a cake board covered in foil and I used straws to stabilize the cake.  I like straws because they are easy to cut.


      I really need to take more pictures WHILE I am making the cake.  Sorry about that.
      The party went really well and Gabe loved his cake.  It tasted awesome and was a big hit.  I even got home in time to watch Cake Boss!


      Thursday, October 28, 2010

      Gabe's Cake: Part 1

      Alright, I have been SO darn busy this month that I have not been able to do anything fun in the kitchen. The one thing I did try, cake bites and little baby cakes, turned out pretty ugly so I didn't even post.


      Well, the good thing is that my friend's son Gabe is turning one and she asked me to make the cake, so I have good motivation. I made a really cute little order form and met with her the other day to plan it out. This cake has to be a big deal so we have been planning for a while. I have to admit that I feel pretty legit with this little order form. 


      I am going out of town this weekend and the cake is for Monday so I have been doing it in installments. Everything is now made so all I have to do on Monday is put it together and decorate. The thing is that every part, singly and separately, tastes SO GOOD that I wanted to blog about it! It's like I'm actually learning something because it just keeps tasting better and better.


      First I made the frosting:
      I watched this video on YouTube about mixing a batch of buttercream. Pretty boring. Well, it was worth it because this frosting turned out SO good. It did not all fit in my mixer very well, but it was SO SMOOTH and so nice looking.


      Here is the link:
      http://www.youtube.com/watch?v=zB4ibkH0V_4


      Look at how smooth this frosting is!


      These are the colors that my friend chose for decorating the cake.  So cute!


      Then I made the cakes:
      I used this recipe. It says it made about 12 cupcakes. I did 4x the recipe, which was A LOT of cake batter, but it turned out that I really did need it all so that was great. I made 3 9"x 1.5" rounds, 2 6"x2" rounds, and one tiny little cake for the baby.

      3 ounces unsweetened chocolate, chopped
      1 cup all-purpose flour
      1/2 teaspoon baking powder
      1/2 teaspoon baking soda
      1/4 teaspoon salt
      1/2 cup (1 stick) unsalted butter, softened
      1 1/4 cups sugar
      2 large eggs
      1 teaspoon vanilla extract
      1/2 cup sour cream


      Directions:


      1. Preheat oven to 350 degrees with rack in center. Prepare the batter: Place chocolate in a medium heatproof bowl, and set it over a medium saucepan of barely simmering water; stir chocolate until melted and smooth. Remove bowl from heat, and set aside to cool slightly. (I did this in the microwave.)
      2. Meanwhile, whisk together flour, baking powder, baking soda, and salt in a medium bowl; set aside.
      3. In the bowl of an electric mixer fitted with the paddle attachment, cream butter and sugar on medium speed, scraping sides of bowl as needed, until light and fluffy. On low speed, mix in melted chocolate. Increase speed to medium, and add eggs, one at a time, mixing well after each addition. Add vanilla, and beat until mixture is creamy and color has lightened slightly, about 1 minute. Mix in sour cream. On low speed, add half of reserved flour mixture, beating until just incorporated. Mix in 1/2 cup water. Add remaining flour mixture, and mix until just incorporated.
      4. Line a cupcake pan with paper liners. Fill each liner with enough batter to come 1/8 inch from top, about 1/3 cup. Bake, rotating pans halfway through, until tops are firm and a cake tester inserted in the center comes out clean, about 20 minutes. Transfer cupcakes to a wire rack to cool in pan for 10 minutes.


      Read more at Marthastewart.com: Hi-Hat Cupcakes - Martha Stewart Recipes


      This is what I did with the extra.  Look how thick that batter is!


      This is one of the best cakes I have ever tasted. It was super moist, but still stuck together enough to be able to cut layers. It was also very chocolaty due to the melted chocolate as opposed to coco powder. I am very VERY happy with this recipe.


      Then I made the filling:
      This is a Brazilian recipe that I learned from a wonderful lady name Luzia when I lived in Sao Paulo. She was a master cake maker and taught me a lot of thing. It is thick and creamy, but not as rich as ganache but still chocolate. I have been doing a lot of fruit filled cakes lately so this was a nice change.


      2 cans sweetened condensed milk
      2 cans whole milk (I just use the sweetened condensed milk can to measure)
      1 can table cream (buy this in the hispanic foods section, or use heavy whipping cream)
      2 T butter
      2 T coco powder


      So yeah, this is rich stuff. Melt butter first, add the sweetened condensed milk and all other ingredients in a large sauce pan. Use a pan with a thick base to prevent burning. Get this to a low rolling boil. Don't worry about the coco powder, it will mix in with time and heat. Keep stirring. I usually use a whisk. Now this has to cook for about 20 minutes-ish. As it cooks it will get thicker and as it cools it will get really thick. I usually let it go until the cream boils and the bubbles pop. When it starts popping out and getting messy, it is usually good. Put plastic wrap directly over the cream (until it's touching) after it cools just a little and stick it in the fridge. The plastic wrap will keep it from forming a film on top. Believe me, you don't want to waste this stuff.

      Saturday, October 9, 2010

      Cherry Chocolate Joy

      I love love LOVE cherry and chocolate together (and so do a lot of people I know) so this week I decided to make a cake just to eat for the fun of it.  I usually only have time to make cakes for birthdays and other events as gift and things, so it was fun to do a cake just to make me happy.  My mom used to make this chocolate cake with cherry pie filling in the middle and iced with whipped topping so I decided to copy it in my own way.  I tried a new chocolate cake recipe.  I was going for moist-ness, which I defiantly got in this one from cooks.com.


      Moist Chocolate Cake

      2 c. sugar
      2 c. flour
      1 tsp. baking powder
      2 tsp. baking soda
      Dash salt
      1/2 c. cocoa
      1/2 c. vegetable oil
      1 c. boiling water
      2 eggs
      1 c. milk
      1 tsp. vanilla


      Mix together, putting eggs and milk in last. Cocoa can be dissolved in boiling water before adding. Batter is very runny. Put in one 9 x 13 or two 8 inch pans. Bake at 350 degrees for 35 minutes or until done.

      This cake batter was very runny and a little hard to get out of the pans and move around, but it tasted so good that I almost didn't mind.  Next time I would flour the pans a little better.


      I torted the cake with some frosting to act as a dam and almost a whole can of cherry pie filling.  It is pretty important to pipe some frosting around the edge so the cherry will stay inside and not make the cake look like its bleeding.  
      I put the top layer on with the help of a plate and a few spatulas and some slight frustration.  I dirty iced this cake, mostly because it is so moist which means it is SO crumbly.  Now that I have tried the dirty ice thing, it is hard to go back to not doing it.  It is just so much smarter.    
      I put this cake in the freezer for quite a while and then iced it all nice and pretty and did some shells around the bottom and a little ring around the top. 
      Inside this ring, I put the rest of the cherry filling and arranged the cherries around the top in a little circle.  
      IT WAS AWESOME!


      Monday, September 27, 2010

      Birth Day

      One of my best friends had her first baby this week!  She had a little girl named Ruby and she turned out PERFECT!  There is nothing sweeter than holding a tiny new born on your chest and seeing her tiny little toes and tiny little ears and her tiny little scapulas.  (I'm in physical therapy school and scapulas are pretty cool.)
      So, naturally, this miracle of life inspired my only creative outlet, cake making.
      I took my inspiration for this cake mostly from one I saw from the Night Kitchen in Philadelphia.   This is the type of cake that makes me want to learn stuff about fondant.


      This cake also reminds me of a Vera Bradley pattern called "sitting in a tree."


      This is one of my friend's favorites and that is how I came up with this cake...


      I used the yellow cake recipe found under the happy birthday 1 post from september 3rd and my normal wilton butter cream.  The really different part about this cake is that I made it in a sheet pan and cut that into 4 squares so that I could stack them and make them into a cube.

      I also made chocolate ganache for the first time.  DEFIANTLY WORTH IT!!!

      I used 8 oz. Ghirardelli bittersweet baking chocolate that was 60% coco and 2 cups cream.  You heat the cream in the microwave until boiling, pour over the chocolate and let the chocolate melt.  Use a wisk to stir.  Then put it in the freezer until it is chilled and whip in the kitchen aid until it is sort of like dense chocolate whipped cream.  UM, that is good!  Next time I want to try it with milk chocolate instead.


      I loved this cake and I think it is beautiful.  I had a hard time frosting a square, but I am going to work on that because it is too pretty to not want to.