Sunday, August 28, 2011

Ships Ahoy, It's A Boy

One of my best and oldest friends is having her first baby boy in October!  As I will be in NY on an internship I cannot be at the birth (I miss everything cool!) I felt an extra need to give a cool baby shower.  I found an invitation on etsy and so I did my best to copy it.  I just used word and google images and got something pretty close.  Here is this example from etsy and where to buy it here.


I painted this sign for the baby room.  (Keate is their last name.)  I used those cardboard-ish blocks from Hobby Lobby, acrylic paint, buttons, and baker's twine.  I love them.

Here is a close up of the A.  I just loved the button with the baker's twine tied in it. 

These were the favors for winning games.  I found the anchors in the "little wooden things" section at HL and painted them red.

 Here is the "guess the baby food" game.  I'm really proud of the papers to write the answers on, which matched the invites.  We also played the "guess how big her belly is" game with yarn.  The best game was this memory/candy bar game.  Better explained here.

These are mini chocolate cupcakes with vanilla buttercream.  They are in adorable Martha Stewart mini cupcake papers that my grandma gave me.  That is the package that never stops giving!

The great napkins I found at Target this summer.  They had great nautical themed party stuff!

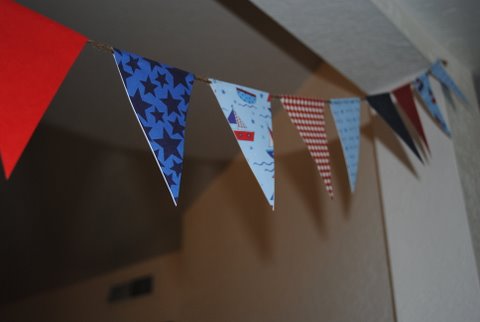
My table with the pennant banner.  

Banner into the living room.  This was made with glue, scrapbook paper, twine, and lots of Netflix.  

Lemon cupcakes with strawberry filling and vanilla buttercream.

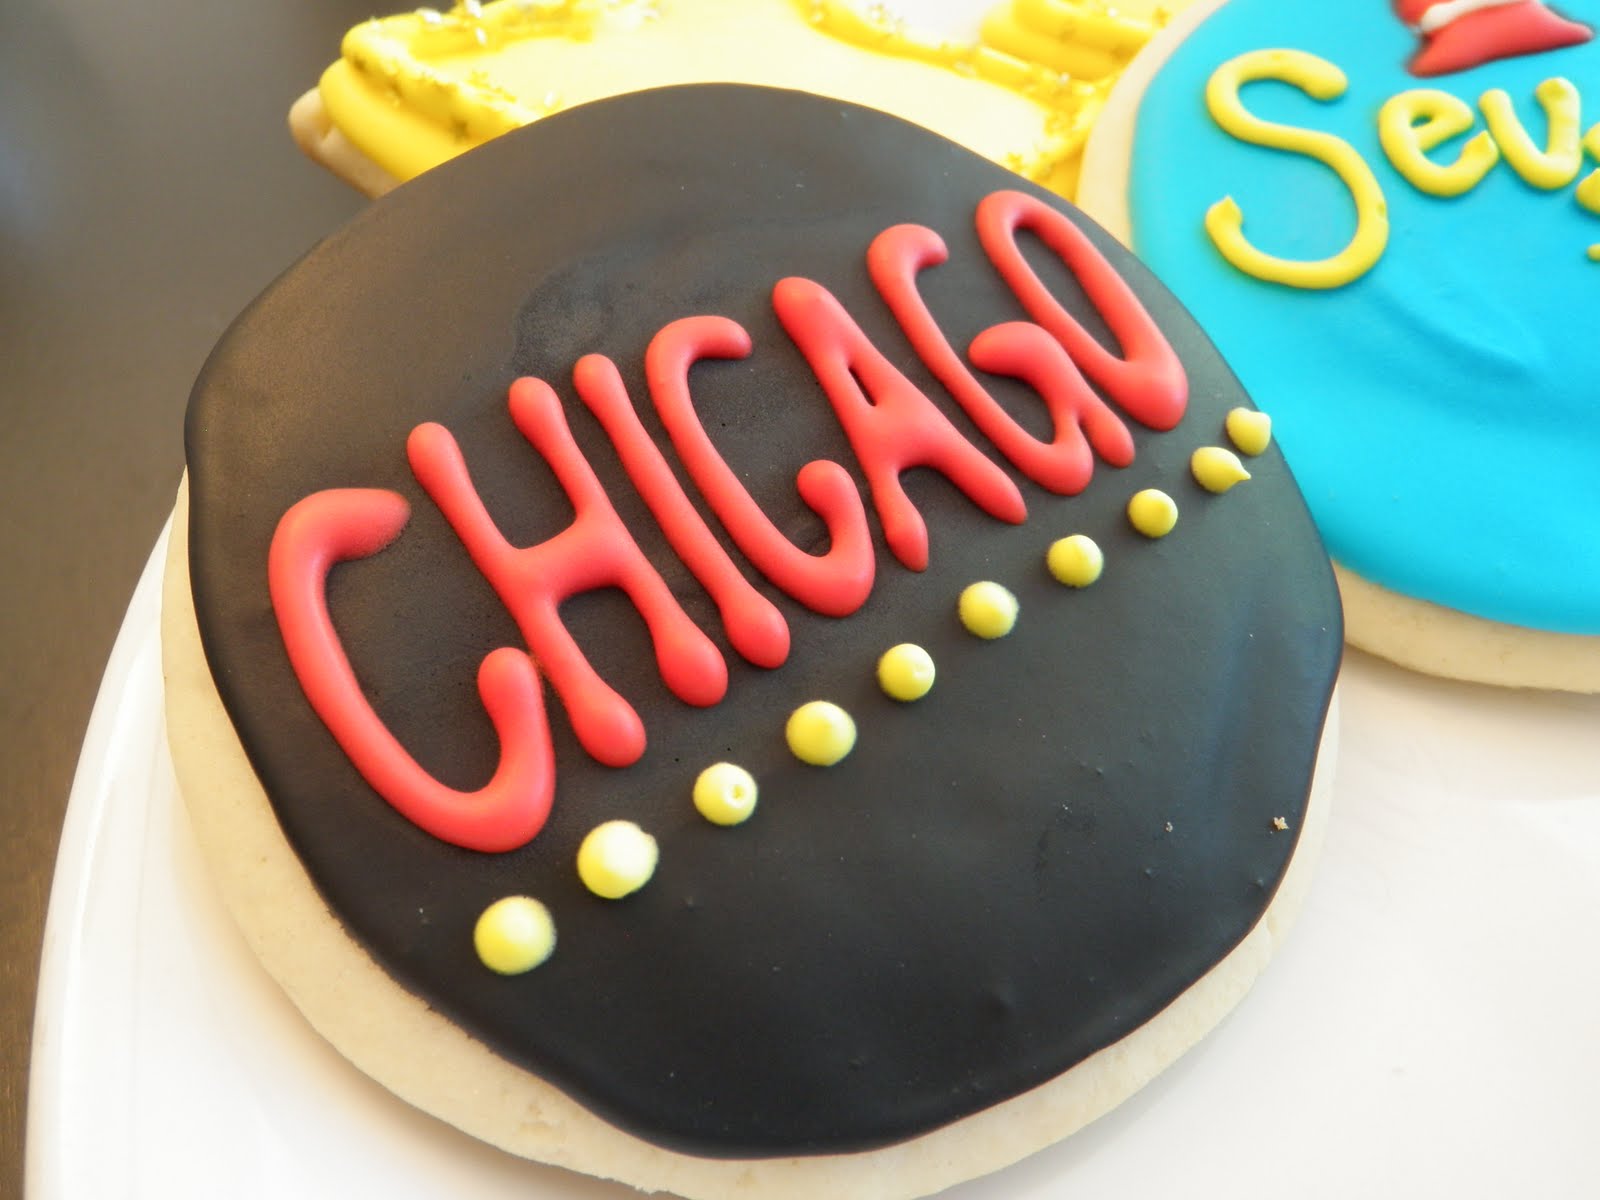
Sugar cookie love!  The ones in the back are sailboats with red and blue bottoms.  The mini ones just have red, white, and blue sprinkles.

Magic Cookie Bars.

I love anchors!

This is Ruby and we are adorable.


Monday, August 8, 2011

Ruffle Cake

Those of you who keep up on Martha Stewart know all about this cake.  It is everywhere in the online world.  Now I understand why!  It is beautiful and SO easy to do.


1.Bake, stack, and dirty ice your cake like normal.  Make sure the top of the cake looks nice and smooth.  Fit a large bag of butter cream with tip No. 103 or 104.  Martha used 103, but her cake was pretty small.  I used 104, since this was a 10" cake.  DO NOT USE CREAM CHEESE FROSTING.  Real butter buttercream is essential to making these ruffles stay stiff.  

Start frosting by staying really close to the cake and ruffling back and forth in about a 1" band.  The wide part of the tip should be closest to the cake.  The tip needs to be almost touching the cake so the ruffle with stick on.

When you get to the top, don't worry too much about how it looks.  For the next ruffle, make sure it touches the cake and the ruffle you have already made on the side.

Your arms will get tired and your ruffles will be slightly different sizes, but once you get it all done, it will look SO nice you will not care.


Make a ruffle that goes all the way around the top to finish if off.  I did this all in one ribbon as my friend rotated the cake stand.  I also did two layers because it was so cute.

I made this banner with bakers twine, paper straws, and some paper.  SO NICE!

Cake Pops!

I have been wanted to make cake pops, but I have been too intimidated.  I finally learned how from a friend so I gave it a try.  Bakerella is the inventor of the cake pop.  She has some great tutorials and ideas on her site.  She also recently wrote a book, on sale at all Barnes and Nobles and Williams Sanoma stores, called Cake Pops.  I love her!  http://www.bakerella.com/dont-lick-bite%E2%80%A6/


Here is my tutorial, if you need a little more help.


Supplies:
1 Box Cake Mix
1 container store bought frosting
Candy Melts
6" or 8" lollipop sticks
Styrofoam block
3"x4" cello bags and ribbon for packaging


1. Bake your cake, just in a 9x13 pan.  Let it cool and crumble it all up into a large bowl.  This is a little weird, but it is fun.  Remember to make sure the cake is COOL!  Add the frosting to the cake and mix it up real good.  It is best to use your hands for this.  Use a little cookie dough size scooper and scoop and roll the cake into balls.  This should make about 50 cake balls.  Put the balls onto a cookie sheet and stick them in the fridge for about an hour.  It is essential to the dipping part that these are cold.  This part is not exciting and needed no pictures.  (And I sort of forgot to take some.)  You can use your own homemade frosting for this part, but just be sure to get the right proportions.  Maybe make it with store bought frosting once so you can get to know the texture of the cake balls.  I made these once and added way to much frosting and it was NOT fun.


2. Melt your candy melts in a sauce pan or double broiler.  Do not get it too hot, just barely melted.  If it is too hot, it starts to "fall off" the cake pop and it will not look smooth.  Get your cake balls out of the fridge.  Pick up a cake ball and notice that there is a flat spot.  This is where you will put the lollipop stick.  

Dip your stick, about an inch deep, into the chocolate.

Insert the stick as far as you can into the cake ball without it poking out the other side.  The chocolate acts as glue to make the stick stay in.  It will pool a little on the outside, but this makes it easier to dip.

Place your pops back on the cookie sheet and let the chocolate dry.  By the time your get all the sticks in, the first ones will be set and ready to dip.


3. Now you are ready to dip.  It is best to use a deeper and narrower pan.  I had to sort of hold mine up while I dipped.  Hold the stick, dip at about a 45 degree angle.  This will cover about 1/3 of your cake pop.  The pool of chocolate comes in handy here because you do not have to dip as deep.

Lift the pop out of the chocolate, rotate the cake pop about 1/3 of the way around and dip again. 

Rotate OUT OF THE CHOCOLATE and dip one more time.  Your pop should be covered.  DO NOT stick the pop in and twist it in the chocolate.  This will twist the stick out.  I have done this A LOT so don't make my same mistake.  DO NOT tap the pop to try to get off extra.  Just twist it, once you pull it out, and stick it in your foam holder. 

I poked holes in this foam before I started.  It is essential to drying your pops nicely so don't try to make these without it.  I bought this piece of foam at a baking supply store.  It is a cake dummy.  Before the chocolate drys you can add sprinkles if you want.

4. These do not take long to dry.  Maybe 20 minutes if it is not too hot in your house.  Pull them out, stick them in little bags, and tie some ribbon!  Enjoy!


Thursday, August 4, 2011

some random projects...

I have been busy with projects for people and cookie order from etsy.  Here is a sampling...


Chocolate Chip Cookie Dough Cupcakes for school


Baby shower cookies.  I finally got some cookie cutters from GyGi's in SLC.


I helped my cake friend, Mandy, with some Hi Hat Cupcakes.  They were amazing, but a little messy.

LOST Cookies for a wedding in NJ.  I know they are not cute, but they are true to Lost!


Some more broadway cookies...

Broadway Cookies

It has been over two weeks since I have posted!  Time flies when you are trying to start a business and go to grad school I guess.  I have been working on some new cookie designs and decided to make these to send to a friend and put up on the Etsy shop.


I love NYC and I got to go to my first Broadway show, ON BROADWAY, this past April.  My mom took me to see Wicked in the Gershwin and it was the time of my life.  I am going to live on Long Island in Sept and Oct for an internship and I hope I get to go again!  Maybe some New Yorkers will buy these cookies from me???


I think this is my favorite!


My awesome grandma got me these little gold star sprinkles!  So special!